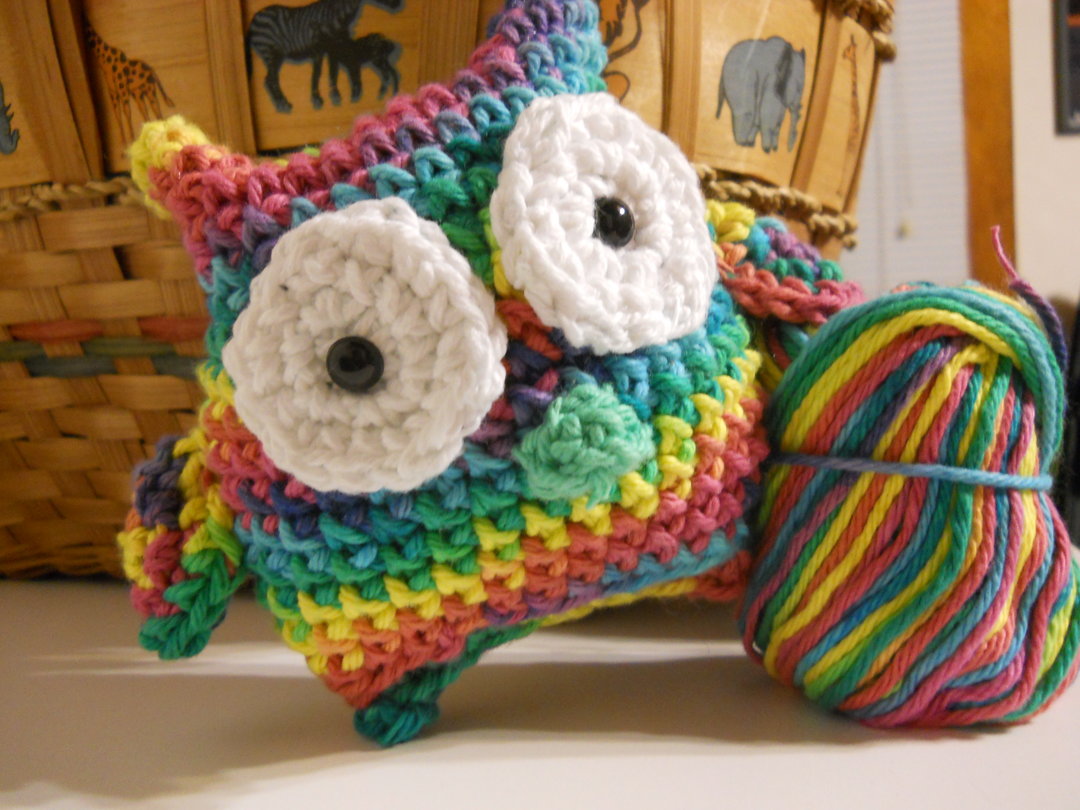
A few months ago, I made a little amigarumi owl for my friend. I thought it was cute, so I wrote up a pattern for it. I originally put it on Ravelry and Etsy, but I think if something is cute everyone should be able to make it :) so here it is.
Colorful and Cute Amigurumi Owl Pattern
by Lindsey Knipe
Things You’ll Need
- H or 5.00 mm Crochet Hook
- 2 9mm Safety Eyes (any color)
- Worsted Weight Yarn (Cotton Lily Sugar’n Cream Yarn used here)
- One Color for Body
- One Color for Eye Area
- One Color for Beak
- Yarn Needle
- Sewing Needle
- Stuffing
- Stitch Markers or Safety Pins
- Thread (any color)
Body for Owl
- Chain (ch) 15 in your choice of yarn for the body of the owl. With work still facing you, single crochet (sc) in the second ch from the hook. Working left, sc in each ch until the last one. In the last ch, 2sc.
- Turn your work so you are working on the other side of the original ch. Make 2 sc in the first ch, sc in each, 2sc in last. Repeat this around, until you get the appropriate width you would like your owl to be. I did this 2 times.
- For 12 rows, sc in each sc around. After this, it would be an appropriate time to attach the eyes, beak, arms, and mold the “ears”.
- Starting the next row, decrease in the first sc. Sc in each sc around, decreasing in the last sc and first sc. These “first” and “last” sc are the places where you made the 2 sc at first. Do this the same amount of times you did the rows of increases in step 2.
- Join (or make a slip stitch) in the back loops only of each sc.
- Do 1 row of sc around.
- Stuff -Fun part-
- Sew both sides of sc together.
Eyes and Arms
- Magic ring, or make 2 ch and make 6 sc in second ch from hook (I did the 6 sc).
- Make 2 sc in each sc around.
- Alternate between 2 sc and 1 sc in each sc around. Join at end, and leave yarn tail for sewing.
For the eyes: do them in one color ( I used white). Once complete, put the safety eyes in the center and insert both into where you see fit on the torso. I put them in the middle with a bit of space in between. Stitch them on with the yarn tail.
For the arms: fold the arm in half, and where the remaining yarn tail is, use your yarn needle to stitch half of the wing closed, so that the other half remains somewhat open. It should look a bit like a rose petal. Then attach on the sides, below the eyes, only where you stitched the wing together, that way it flares out and actually resembles a wing.
How to mold the ears: pinch the top corners of the rectangle torso you created. The pressure should force the top face in between the two side “ears” to concave. This creates the two pointy ears you can see in the picture above. To get them to stay this way, take your thread and sewing needle, and going through the inside of the torso, stitch where the concave top meets the sides of the torso.
Beak
- Ch 7
- Sc in each ch.
- Sew the two ends of the ch underneath where you placed the eyes, making a triangle beak.
Thank you so much for downloading and trying my pattern. If you have any issues be sure to ask me any questions on Ravelry or email me at Streakshadow13@gmail.com. Please don’t resell or claim this pattern as your own. You may sell items made from it though :). Have a great day and enjoy your owl!
Love,
Lindsey
No comments:
Post a Comment